
The Cat Softie! She's finished and she was pretty darn easy! I think it was a good confidence booster to start off easy! Here's how the project progressed:
After going to FedEx Office to blow up the patterns, I cut them out, laid them onto the fabric, pinned the pattern to the fabric and added my own seam allowance. *I did this because I decided not to blow up the pattern quite as large as specified in the book. The book called for 100% and I only did 60%. (My Grandma-in-law does have to fly back home with this thing!)

Tip: On the round bottom piece I cut little slits all the way around to allow the fabric to curve a bit easier when pinning and sewing.
I have to admit, when pinning the bottom piece onto the body of the cat, it seemed as if the bottom was too big. I just pinned and pushed the fabric around until there were only a few little bumps in the bottom fabric. When I was sewing it up, the foot glider worked it all out and I finished with a smooth edge. Whew...thank goodness.
Next up, stuffing! I was worried that the cat would be bumpy because I chose some pretty thin fabric for the body. The trick to preventing that is LOTS of stuffing!
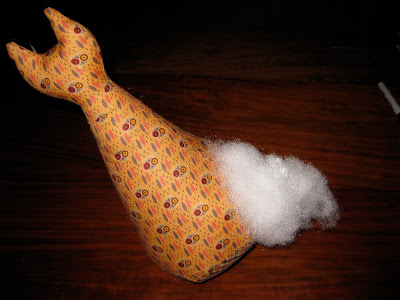

I finally closed up the stuffing hole and voila...the finished product (see below.) My sweet husband is at his studio now shooting a better image for the grand finale. I'll post that upon receipt. All in all I think it turned out well and it was quite easy to do. Good luck to those of you who try one of your own! I think it would make a great door-stopper. Happy Weekend!


No comments:
Post a Comment
Hey... You! I think you are the tops for showing the comment love! Thank you for your comments and support. It means so very much. If you leave a comment, you will find the reply in comments as well. xo